The Distribute step provides team members with the ability to distribute the files to the users about the files that have been published within the Workspace. There are two main ways of distributing files:
Below
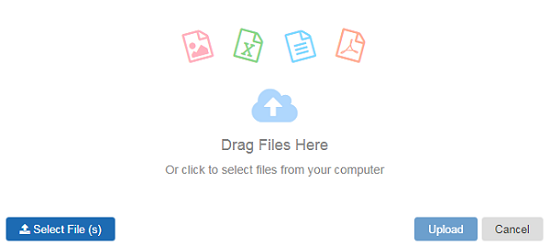
are the steps to distribute a file while using the new upload interface:
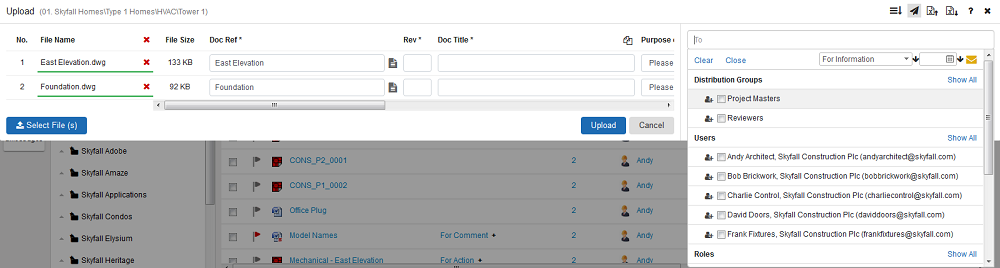
1. Click on  icon at the top right. Upload
window expands
and displays a section with 'To' and 'Subject' fields. If uploading and
distributing a new revision of any file which was previously uploaded
and distributed, you will see a
icon at the top right. Upload
window expands
and displays a section with 'To' and 'Subject' fields. If uploading and
distributing a new revision of any file which was previously uploaded
and distributed, you will see a  icon. Click on it to copy
users with whom the previous revision was shared.
icon. Click on it to copy
users with whom the previous revision was shared.

Click in the 'To' box to see a list of users or roles or distribution groups
from which you can add a recipient name for distribution. Type in the
initial characters of the user, role or distribution group to get auto-suggestions
based on the same.
To
expand distribution groups or roles and find the users in it, click on
![]() icon that
will appear upon mouse hover on the concerned distribution group or role
name.
icon that
will appear upon mouse hover on the concerned distribution group or role
name.
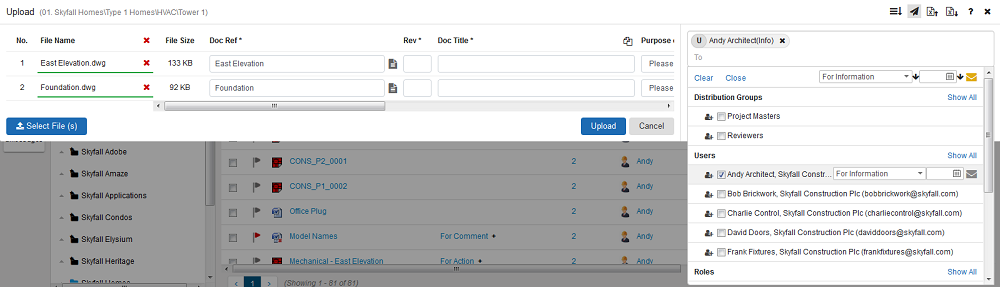
By
default, 'For Information' task associates to all the users added in the
'To' textbox. In 'For Information' task. It is not mandatory to select
a task due date while assigning 'For Information' task.
To
change the task, click on the name of specific user for whom the task
needs to be changed.
You can
select the task from dropdown as well as select the expected date to complete
the tasks from calendar.
![]() icon indicates email notification will be sent for selected file
distribution. Click on it to avoid sending email notification, which would
change the icon color to grey.
icon indicates email notification will be sent for selected file
distribution. Click on it to avoid sending email notification, which would
change the icon color to grey.
Click on ![]() icon to give other tasks to the same user. You can do this for individual
users as well as users in a particular distribution group or role.
icon to give other tasks to the same user. You can do this for individual
users as well as users in a particular distribution group or role.
Click on  icon corresponding
to the name of selected user/s to remove them from distribution.
icon corresponding
to the name of selected user/s to remove them from distribution.
Subject
-
Enter the notes for tasks assigned and click 'Close' to close the tasks
window.
Once done, click on icon again to close
the distribution screen.
Click on 'Upload' to start upload with distribution.
Below are the steps to distribute an existing file on Asite:
1. Click on filename to
view file OR Click on the ![]() icon
icon
2. Click on ![]() to Distribute
to Distribute
Availability of "Distribute" icon may depend upon whether the "File Distribution" activity is locked or unlocked for the selected file.
3. Click on the "Copy Distribution from Previous Revision" button against the individual revisions which will automatically populate all the active users who have been assigned an action by this Document Publisher in the Previous Revision.

3. Select Company or Distribution Groups or Roles from the top drop down menu

Once a Group or Company has been selected, the appropriate individuals will appear.
![]() The Companies option is available in the drop
down only if you have Allow
Custom Distribution -
All Orgs or Allow
Custom Distribution -
Own Org privilege assigned.
The Companies option is available in the drop
down only if you have Allow
Custom Distribution -
All Orgs or Allow
Custom Distribution -
Own Org privilege assigned.
![]() Names of the companies other than your company
will be displayed for selection only if you have Allow
Custom Distribution - All Org privilege assigned.
Names of the companies other than your company
will be displayed for selection only if you have Allow
Custom Distribution - All Org privilege assigned.
4. Select individuals to receive file/s by clicking on their name/s
![]() Users may multiple select by using their Shift
or Ctrl key
Users may multiple select by using their Shift
or Ctrl key
5. Click on Add to Distribution List to confirm selection
![]() Only users having access to the folders in which
the documents exist will be allowed to be added to the distribution list.
Only users having access to the folders in which
the documents exist will be allowed to be added to the distribution list.
6. Select Action Required, Respond By time & enter Action Notes for each individual where necessary (For Forms distribution, actions may vary)
7. Click on Add to Distribution List to confirm selection
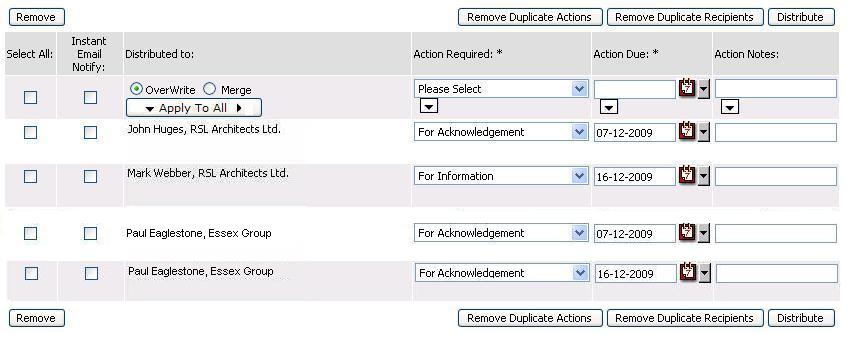
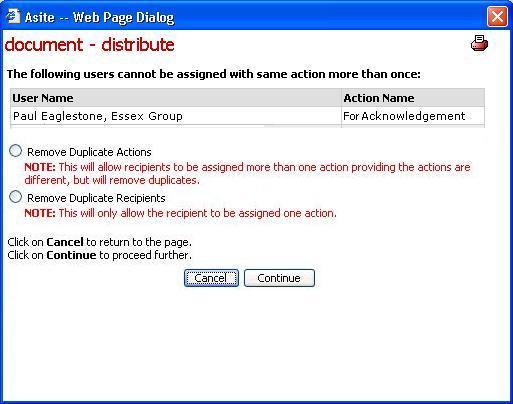
![]() Click on
Click on ![]() to Remove
Duplicate Actions from the distribution list
to Remove
Duplicate Actions from the distribution list
![]() Click on
Click on ![]() to Remove
Duplicate Recipients from the distribution list.
to Remove
Duplicate Recipients from the distribution list.
![]() A custom prompt
will appear for duplicate actions / users on clicking the “Distribute”
button
A custom prompt
will appear for duplicate actions / users on clicking the “Distribute”
button
![]() Click on the
Click on the ![]() icon to select Respond By time
icon to select Respond By time
![]() The Instant Email Notif. shall be pre-populated form
User Preferences
The Instant Email Notif. shall be pre-populated form
User Preferences
8. Click on Distribute to send
![]() Email Notif. shall be triggered to users based on definition.
Email Notif. shall be triggered to users based on definition.
![]() A unique Transmittal No.
will be generated and displayed in Document Distribution
Audit Trail as well as Document Distribution Report.
A unique Transmittal No.
will be generated and displayed in Document Distribution
Audit Trail as well as Document Distribution Report.
Useful Links: