Workspace team members may choose to link documents from folders so they are visible to users from other folders. Team members may link documents between folders within their Workspace or across different Workspaces depending on user Role. Team members may also link documents from Document Manager to Tender Manager
![]() Users with Admin
Role in Workspace
can link documents to other folders.
Users with Admin
Role in Workspace
can link documents to other folders.
The following lists the steps to link file/s into other folders within Workspace:
1. Select file/s to be linked to another folder / Workspace

2. Click on the ![]() icon
icon
3. Select a folder to link document/s to
![]() Users may link documents to another Workspace
using the drop down menu only if they have permission to access other
Workspaces.
Users may link documents to another Workspace
using the drop down menu only if they have permission to access other
Workspaces.
4. Click on Create Link
The confirmation screen will be displayed with names of documents for linking. Select document metadata values that are available in the Workspace where the documents are being linked
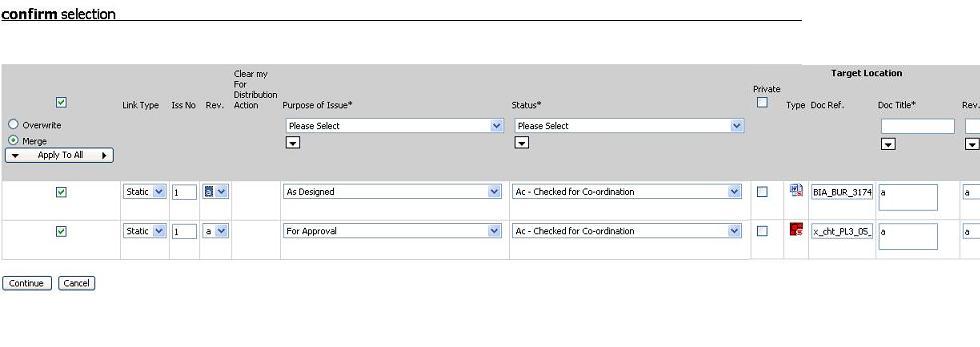
![]() Select
the Private option to publish the document as a private linked doc to
the target folder
Select
the Private option to publish the document as a private linked doc to
the target folder
![]() Click on “Apply to All” to allow batch
editing of the meta-data fields.
Click on “Apply to All” to allow batch
editing of the meta-data fields.
5. Click on Continue
6. Select recipients to receive document/s
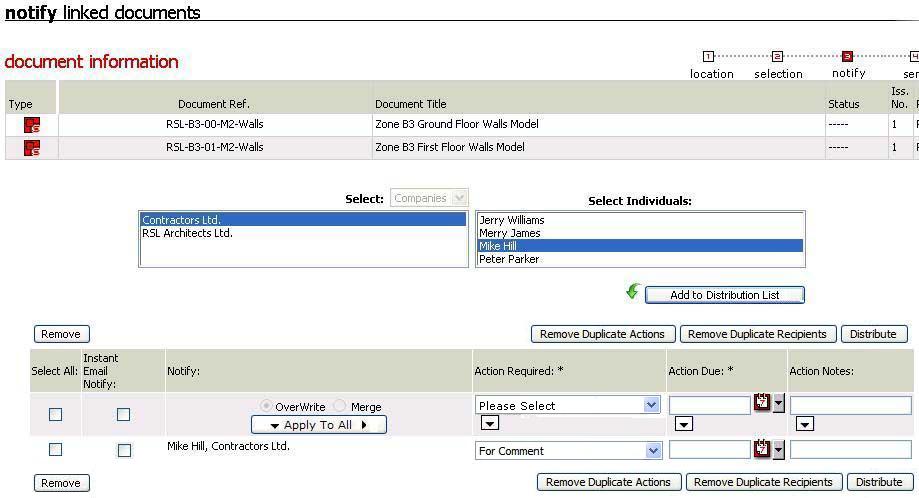
7. Click on Add to Distribution List.
8. Select Action Required, Action Due Date & any action notes for individuals in the distribution list
9. Click on Distribute.
![]() Document
will be linked to the new folder with same issue No. as the parent document
Document
will be linked to the new folder with same issue No. as the parent document
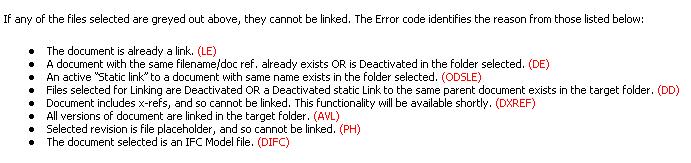
Hints: For following scenario's documents cannot be linked:
FAQ's:
Q: I want to link a document but I am not able to see the Link Documents Icon.
A: Only users with Workspace Administrator or Workspace Document Publisher roles can link a document. Ask your administrator to give you any one of the role.
Useful Links: