Users now have the flexibility to import data from an XLS file without having to key in all information manually. This will ease user input of heavy and voluminous data entry within the AppBuilder form. Import form XLS icon is available while creating ORI message and not available in Edit ORI, RES or FWD message creation.
Steps to use this functionality are:
![]() Select “Forms – Manage Workspace settings” option in Admin menu.
Select “Forms – Manage Workspace settings” option in Admin menu.
![]() Select f “Enable
XML / XLS file Import, Email-In” option and mark it as YES.
Select f “Enable
XML / XLS file Import, Email-In” option and mark it as YES.
![]()
![]() Click on Submit
to save the settings.
Click on Submit
to save the settings.
By enabling the above referred form setting, user will be displayed
an icon ![]() at
the top right hand panel
at
the top right hand panel ![]()
![]() Click on icon
Click on icon ![]()
![]() Click on Browse” button to select the XLS
file that has the information already inputted.
Click on Browse” button to select the XLS
file that has the information already inputted.

![]() Once the XLS file is selected, “Import” button
will be displayed
Once the XLS file is selected, “Import” button
will be displayed
![]() Click on "Import"
to populate information as specified in the XLS file.
Click on "Import"
to populate information as specified in the XLS file.

Steps to create an XLS file are:
![]() Create a new XLS file in your local folder
Create a new XLS file in your local folder
![]() Open the blank XLS file
Open the blank XLS file
1. To input Single Value fields create a worksheet with label ‘SingleValue” The values in “SingleValue” worksheet will need to be inputted as under:
Column A – Description - This must contain the description of the field for which value needs to be inputted
Column B – Field Name – This must contain the field name as specified in the xsn. To copy the xsn field name, you need to open the xsn in design mode and double click on the field. The prompt will populate the field name which can be copied and pasted to the worksheet.
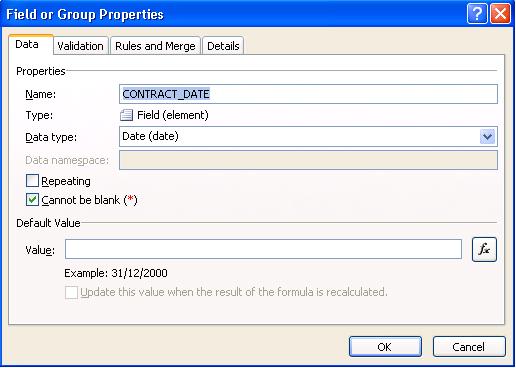
Column C – Field Value – This column must contain the actual value that needs to be imported into the respective fields.

Note:
For date fields, the value needs to be inputted in format yyyy-mm-dd.
For Auto-Distribution, the user id # name will need to be correctly inputted.
2. To input multi-line date used in repeating Table / section within the form design, create a new worksheet within the XLS file
Double click on the Group having the repeating Table and copy the name
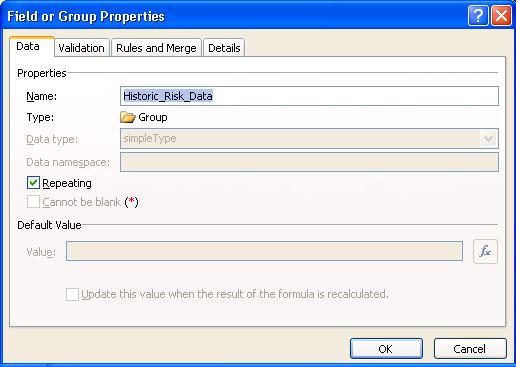
Create a new worksheet with the Group name
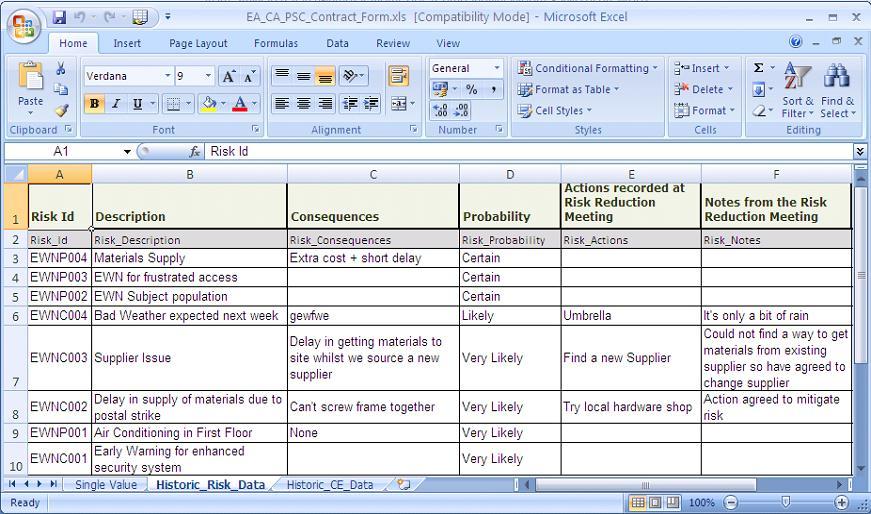
The rows to be used for repeating table are:
Row A1 – This will contain the field description
Row A2 – This will contain the field name as specified in the xsn form.
Row A3 – This row onwards the field values to be imported to the repeating table can be specified.
Hints:
User can create as many worksheets as required in one single XLS file but need to ensure that the Worksheet name and Field names are correctly mapped and match to the fields as designed in the xsn file.
The date format to be used is yyyy-mm-dd
As part of input, user needs to ensure that all values set via the Rules within the fields are also correctly mapped and field values inputted so that the values are correctly mapped to the fields hidden on UI.
For autodistribute = 2, set "DS_ACTIONDUEDATE", DS_AUTODISTRIBUTE and DS_FORMACTIONS outside the repetitive group in custom form else above needs to be specified in excel sheet of repetitive tab and last row value is considered for form action and its due date.
Exceptions:
The import may result in a system message which could possibly be due to the following reasons:
The Field Names specified in the worksheet(s) maybe incorrect or missing. Please verify the field names with the form and try again.
The selected file does not match with the required inputs.
For Tabular data with repeating records, the worksheet name may not be matching with the Group Name for the repeating section.
A suitable custom error page will be displayed to the user to facilitate them rectify and import again.
Note:
For date fields, the value needs to be inputted in format yyyy-mm-dd.
For Auto-Distribution, the user id # name will need to be correctly inputted.
Useful Links:
Manage Form Settings within Workspace
Cross Workspace Linking of Forms
Import XML file to the form on creation