Markups may be created directly onto a document of drawing in order that a user may cross reference information. The Brava viewer provides users with the ability to create, save and view markups online. Administrators can configure system behavior by selecting appropriate Mark Up Option in workspace for both Java and Thin Client Viewer.
Mark Up Options:
1. Always Launch Create Comment Page
2. Save Mark Up Only
3. Create Comment Automatically
![]() Mark Up options for any project
are accessible from "Workspace Settings" which can be accessed
from Edit Workspace option in Admin drop down.
Mark Up options for any project
are accessible from "Workspace Settings" which can be accessed
from Edit Workspace option in Admin drop down.
![]() Availability
of "Markup" option may depend upon whether the "Commenting"
activity is locked or unlocked for the selected file.
Availability
of "Markup" option may depend upon whether the "Commenting"
activity is locked or unlocked for the selected file.
If the workspace is configured to use Universal Web Viewer, the file will open in Universal Web Viewer - Adoddle View as a separate popup. Click here for detailed help.
System Behavior for Mark Up Options Thin Client Viewer (HTML):
1. Always Launch Create Comment Page: When this option is selected user gets below pop up while saving any mark up.
![]() Launch Create Comment Page check box is NOT visible.
Launch Create Comment Page check box is NOT visible.
![]() By clicking OK a comment is created
and the markup is also saved.
By clicking OK a comment is created
and the markup is also saved.
2. Save Mark Up Only: When this option is selected user gets below pop up while saving any mark up.
![]() Launch Create Comment Page check box is NOT visible.
Launch Create Comment Page check box is NOT visible.
![]() By clicking OK a comment is created
and the markup is also saved.
By clicking OK a comment is created
and the markup is also saved.
3. Create Comment Automatically: When this option is selected user gets below pop up while saving any mark up.
![]() Launch Create Comment Page check box is NOT visible.
Launch Create Comment Page check box is NOT visible.
![]() By clicking OK a comment is created
and the markup is also saved.
By clicking OK a comment is created
and the markup is also saved.
System Behavior for Mark Up Options Java Viewer:
1. Always Launch Create Comment Page: When this option is selected user gets below pop up while saving any mark up.
![]() Launch Create Comment Page check box is selected by default
and it is watermarked.
Launch Create Comment Page check box is selected by default
and it is watermarked.
![]() By clicking OK a create comment
page is launched with the markup created already associated with comment.
By clicking OK a create comment
page is launched with the markup created already associated with comment.
![]() User can distribute the comment with
required project users and even mark it as Private Comment.
User can distribute the comment with
required project users and even mark it as Private Comment.
![]() User can also associate any document,
file or form with this comment
User can also associate any document,
file or form with this comment
![]() User can also associate
other markups created on current revision of this document with the comment.
User can also associate
other markups created on current revision of this document with the comment.
2. Save Mark Up Only: When this option is selected user gets below pop up while saving any mark up.
![]() Launch Create Comment Page check box is selected by default
and it is NOT watermarked.
Launch Create Comment Page check box is selected by default
and it is NOT watermarked.
If the check box is checked the system behavior is as mentioned below:
![]() By clicking OK a create comment
page is launched with the markup created already associated with comment.
By clicking OK a create comment
page is launched with the markup created already associated with comment.
![]() User can distribute the comment with
required project users and even mark it as Private Comment.
User can distribute the comment with
required project users and even mark it as Private Comment.
![]() User can also associate any document,
file or form with this comment
User can also associate any document,
file or form with this comment
![]() User can also associate
other markups created on current revision of this document with the comment.
User can also associate
other markups created on current revision of this document with the comment.
If the check box NOT checked the system behavior is as mentioned below:
![]() Only
the mark up is saved and no comment is created..
Only
the mark up is saved and no comment is created..
3. Create Comment Automatically: When this option is selected user gets below pop up while saving any mark up.
![]() Launch Create Comment Page check box is selected by default
and it is watermarked.
Launch Create Comment Page check box is selected by default
and it is watermarked.
![]() By clicking OK a create comment
page is launched with the markup created already associated with comment.
By clicking OK a create comment
page is launched with the markup created already associated with comment.
![]() User can distribute the comment with
required project users and even mark it as Private Comment.
User can distribute the comment with
required project users and even mark it as Private Comment.
![]() User can also associate any document,
file or form with this comment
User can also associate any document,
file or form with this comment
![]() User can also associate
other markups created on current revision of this document with the comment.
User can also associate
other markups created on current revision of this document with the comment.
Steps to create a Mark Up:
1. Open drawing (for example)
2. Click on the ![]() icon
icon
3. Select New from the menu
4. Click on ![]() to create text
to create text
5. Click on the area of the drawing to insert text
6. Start typing
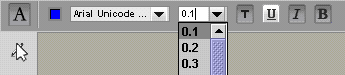
![]() Hint: Options are available at the top
to amend the text size / colour etc
Hint: Options are available at the top
to amend the text size / colour etc
Example using Icons Available
The following icons are used to provide users with the ability to navigate around the drawing/document:
![]()
![]() For example, select Square, Cloud or Pencil
icons to insert objects or draw
For example, select Square, Cloud or Pencil
icons to insert objects or draw
The following icons are used to create Markup on a drawing/document:
![]()
![]()
![]()
![]()
![]()
![]()
![]()
![]()
![]()
![]()
![]()
Select an Icon to create the ability to carry out the function
![]() For example, Select
For example, Select ![]() icon to draw an arrow
icon to draw an arrow
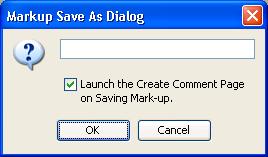
Select Save As option from the menu to save the Mark-up
To modify Mark-ups, select Open for Review and modify the mark-ups
![]() Mark-ups once associated with any comment cannot
be modified.
Mark-ups once associated with any comment cannot
be modified.
FAQ's
Q: I do not see Create Markup Icon while viewing any document
A: The ability to Create Markups is available only for the users with “Can Create Comments" Workspace level privilege assigned to them
Useful Links: